Jump Run Guide
This page explains how the Jump Run tool connects a proposed jump run, nearby landmarks, forecast winds, and the area around a drop zone.
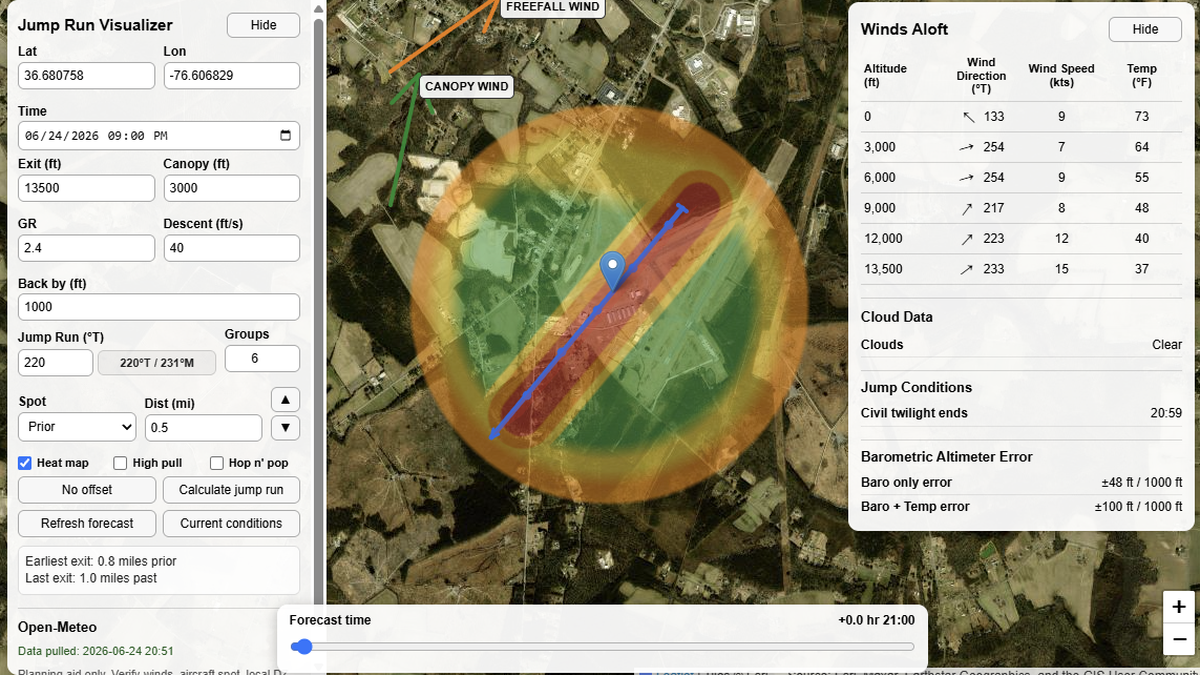
What the Jump Run tool is intended to show
The tool places a planned jump run heading, the selected drop zone or target point, forecast winds at several altitude layers, and the relationship between selected inputs and the map display.
Important inputs
- Exit altitude: the planned aircraft exit altitude used to evaluate winds at and below the planned exit.
- Under canopy altitude: the altitude where the jumper is under canopy. This is not the parachute deployment altitude.
- Back-by altitude: the altitude the user intends to reach the selected target by.
- Jump run heading: the proposed aircraft track in degrees true.
- Spot distance and offset: adjustments used to review the relationship between the selected point and the displayed jump run.
Winds aloft and drift review
Winds aloft can vary substantially by altitude. A surface wind report may not describe what is happening at 3,000 feet, 6,000 feet, 9,000 feet, or near exit altitude. Reviewing wind layers can help a skydiver understand why the apparent best exit point may change through the day. The Jump Run page gives a visual planning reference for how forecast wind layers relate to the selected jump run and target.
Barometric error reference
The barometric error display is the expected deviation of barometric altimeters from true altitude under the given environmental conditions. This is a planning awareness item, not a replacement for a skydiving altimeter. Barometric instruments and GPS-derived true altitude can differ because they measure altitude differently and respond differently to pressure, temperature, signal quality, and calibration.
How to use
Enter the planned conditions in the left panel, then refresh the forecast. The tool pulls forecast winds and updates the map so you can review the displayed jump run, canopy return range, winds aloft, cloud information, and nearby landmarks. Before jumping, use the display to brief the general picture: where the jump run sits, what landmarks are nearby, and how the selected inputs affect the return-to-target reference.